Kubernetes Dashboard
Sample article showcasing basic Markdown syntax and formatting for HTML elements.

Last week I wrote a small blog on deploying a Kubernetes cluster on a cluster of old raspberry pi’s. This week I am going to deploy the Kubernetes Dashboard to the cluster to give us a GUI.
Why do we need a GUI?
That is a very good question and to be honest I don’t think we do, but whenever I learn something new I typically like the convenience of discovering what is possible by clicking on a GUI rather than reading docs. So I will use the GUI to inspect what I have done through the command line and hopefully get a faster on-ramp into the world of Kubernetes.
Our First Deployment
I am taking this installation directly from some documents provided by Rancher which are extremely helpful for the beginner. All the following commands are being executed on the master node (pi-proxy).
First create the deployment directly from the Kubernetes github repo
GITHUB_URL=https://github.com/kubernetes/dashboard/releases
VERSION_KUBE_DASHBOARD=$(curl -w '%{url_effective}' -I -L -s -S ${GITHUB_URL}/latest -o /dev/null | sed -e 's|.*/||')

sudo k3s kubectl create -f https://raw.githubusercontent.com/kubernetes/dashboard/${VERSION_KUBE_DASHBOARD}/aio/deploy/recommended.yaml
The dashboard needs a user with an administrative role to authenticate and use the dashboard. This is also a gentle introduction to the world of YAML that we will spend a lot of time in with Kubernetes.
Create an admin user resource manifest file (dashboard.admin-user.yml)
apiVersion: v1
kind: ServiceAccount
metadata:
  name: admin-user
  namespace: kubernetes-dashboard
Create an admin role resource manifest file (dashboard.admin-user-role.yml)
apiVersion: rbac.authorization.k8s.io/v1
kind: ClusterRoleBinding
metadata:
  name: admin-user
roleRef:
  apiGroup: rbac.authorization.k8s.io
  kind: ClusterRole
  name: cluster-admin
subjects:
- kind: ServiceAccount
  name: admin-user
  namespace: kubernetes-dashboard
Once we have these two YAML files we can create the admin-user.
sudo k3s kubectl create -f dashboard.admin-user.yml -f dashboard.admin-user-role.yml
Next we need to extract the admin-user token that we can use to gain access to the dashboard.
sudo k3s kubectl -n kubernetes-dashboard describe secret admin-user-token | grep ^token
Accessing the Dashboard
The dashboard by default is not exposed externally (this is a whole other topic on Kubernetes networking/overlays etc). But we can expose it using a Kubernetes proxy, which will provide a means of accessing all services within the cluster, using a convenient hierarchy.
sudo k3s kubectl proxy
This will expose the Kubernetes dashboard on Port 8001 on the pi-proxy listening on localhost only.
Obviously this is not typically useful. So from your Mac etc. use ssh to do some port forwarding. Which in my case was simply
ssh -L8001:localhost:8001 pi@pi-proxy
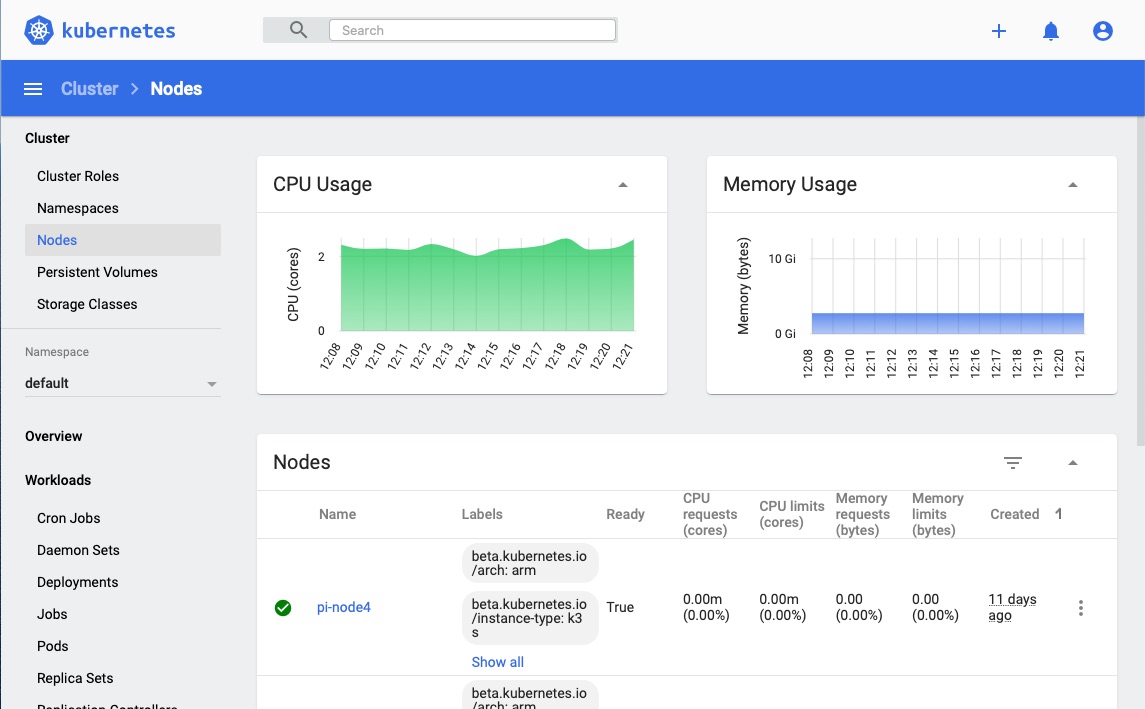
Now I can access the Dashboard using the URL above on my Mac. Paste the access token (from above) into the login screen and you will have access to the Kubernetes Dashboard.